


Screens are the lifeblood of a screen printing operation, so your profitability can depend on how well you maintain imaging performance while minimizing cleaning time and material costs.
The industry's most popular screen construction — monofilament polyester mesh on static aluminum frames — delivers 100,000 to 200,000 quality images when cleaned and handled properly, but improper screen care can erode profitability in multiple ways:
- Punctures or weakened glue bonds can cause premature screen failure. At $15 to $30 per screen — depending on mesh spacing — screen replacement costs can erode profits.
- Inappropriate cleaning can cause fiber degradation, poor imaging performance and high reject rates.
- Excessive use of water or cleaning agents literally washes profits down the drain.
Review your cleaning protocols periodically to help identify problems with screens, or deficiencies of chemistries that should be replaced for superior results. Consult your screen printing supplier for cleaning agents compatible with your needs.
IMPROVE SCREEN IMAGING QUALITY AND LONGEVITY FOUR WAYS:
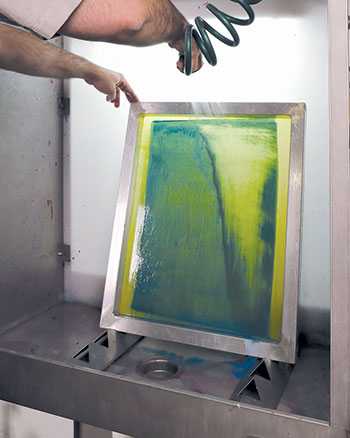
Step 1: Ink Cleanup
Ink degraders for solvent-based inks and plastisols are notorious for damaging cyanoacrylate and urethane glues that bond mesh screens to frames. Do not allow screens treated with ink degrader to remain upright for an extended time since the cleaner can puddle on the bottom frame and attack the glue. Restrict chemical exposure time to a minute or less by cleaning screens in small batches using a compact washout station such as a Vastex VWB-3621.
After removing any excess ink, apply the minimal amount of ink degrader needed on both sides of the screen, and agitate with a soft nylon-bristle brush. Rinse under low pressure on each side to remove the cleaner and contaminants without splashing, and then finish with a high-pressure rinse on each side. Pressure washing can pay for itself in a matter of months by minimizing water use.
Avoid ink degraders that are not designed for plastisols because they can lock in the emulsion.
Also, never use mineral spirits as a low cost alternative, since they become an environmental hazard when washed down the drain.
Step 2: Emulsion Removal
Acids used to soften the emulsion for removal will not attack the glue holding the mesh to the screen. However, if the softened emulsion is allowed to dry, it can become permanently affixed to the screen. Apply acid to both sides of the screen and agitate with a soft nylon-bristle brush. Clean each side with a low-pressure rinse, followed by a high-pressure rinse.
Step 3: Stain Removal
Perform this step only if stains remain after the first two steps. Untreated stains can make it difficult to produce a clean image on the next print run. Match your cleaning agent to the specific need, since an ink stain in the knuckle of the mesh will require a different stain remover than a yellow-brown stain caused by underexposed diazo emulsion. Follow with low-pressure, then high-pressure rinses.
Step 4: Degreasing
Degreasing is a critical final step for removing all residues prior to recoating with emulsion. Using generic janitorial degreasers can lead to print quality problems.
Select cost-effective degreasing agents formulated specifically for screen printing that are chemically compatible with your screens and processes. Unlike some generic cleaners, proper degreasing agents do not contain abrasive grit that can damage the screen mesh, increase cleaning difficulty and/or shorten screen life.
Use a brush dedicated exclusively to your degreasing process to avoid re-introducing chemical residues from earlier cleaning steps. Also, rinse only with low pressure to avoid splashing wash-sink contaminants onto screens.
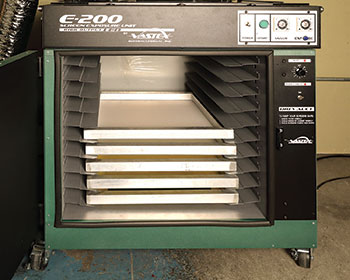
Maintain cleanliness through controlled drying
Avoid drying screens in front of fans that can blow dust onto damp surfaces. Remove the majority of excess moisture from clean-rinsed screens with a wet/dry shop-vacuum head designed for screen mesh, and then finish drying in an enclosed cabinet designed for this purpose such as a Vastex Dri-Vault screen drying cabinet in which controlled heated and filtered airflow dry screens quickly without contamination. Horizontal stacking of screens in the cabinet prevents streaking from residual contamination dripping down a vertically oriented screen.